
Plank: How to Learn It
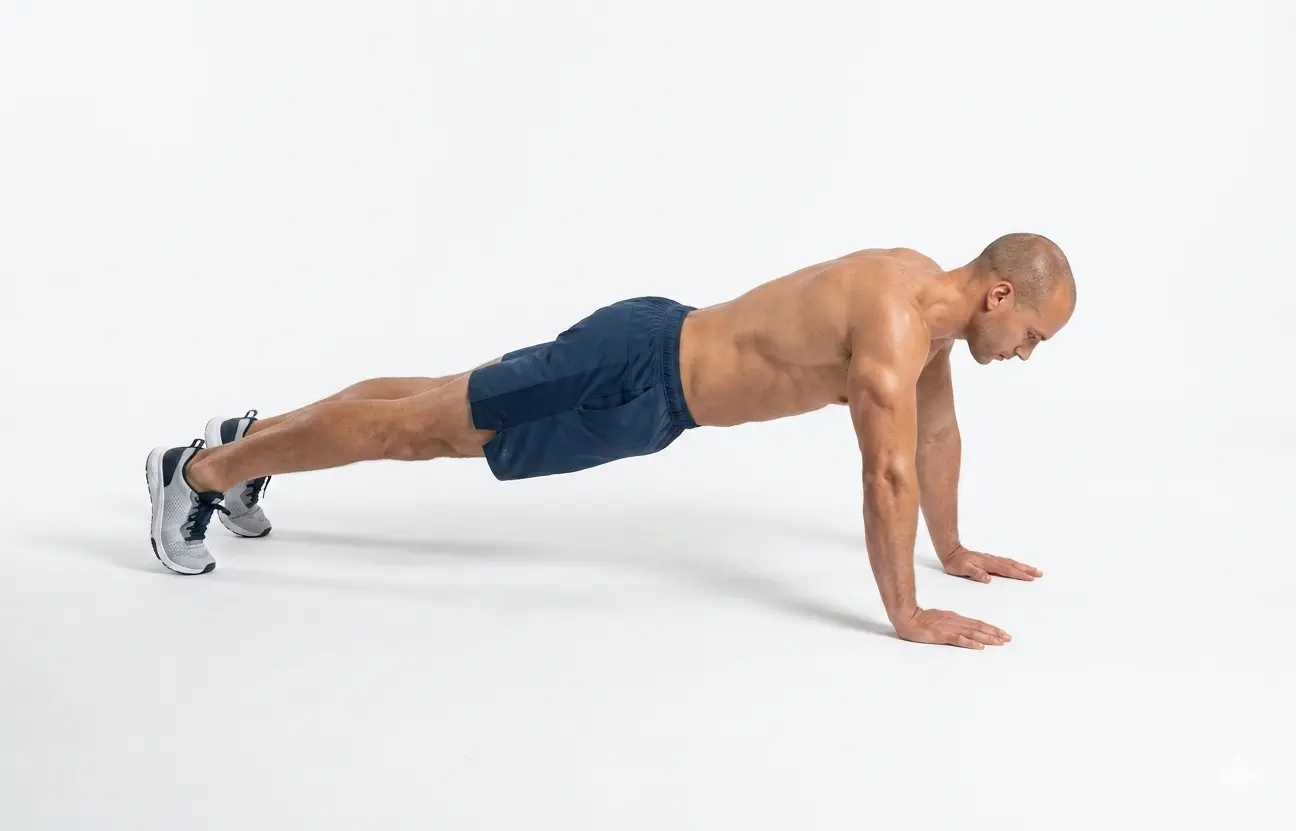
If you have never trained before, the plank is the friendliest place to start. There is no bar to hang from, no gym membership, and nothing to be embarrassed about. You get down on the floor, hold a straight line, and brace. That is the whole move. It looks simple because it is, but the plank quietly teaches the single most important habit in calisthenics: keeping your whole body tight and still against gravity. Master that here, on the ground, and every harder skill later becomes reachable. And if a full plank feels like too much on day one, that is completely fine. You start on your knees, and you build from there.
What Is the Plank?
A plank is an isometric hold. That means you are not moving up and down for reps; you get into one position and hold it while your core fights to keep you from sagging. In Overcoming Gravity, Steven Low groups the plank with the other body-tension drills like the side plank, reverse plank, and hollow hold, and describes their job plainly: they train your body to keep tension in the core so it can hold itself still against gravity.
This is called anti-extension strength. Your abs are working to stop your lower back from arching and your hips from dropping toward the floor. It is the same tension you will need for a proper push-up, a hollow hold, and eventually skills like the L-sit and the front lever. The plank is the first, gentlest version of a demand that never really goes away.
Prerequisites: What You Need Before You Start
Almost nothing. This is a true level 1 entry point. You do not need to be strong, flexible, or in shape first. You need a bit of floor and a few minutes.
If holding a full plank on your hands feels shaky or your lower back complains, that is your signal to start one step earlier, on your knees. The bent-knee plank shortens the lever your core has to control, so you get the same bracing lesson with far less load. There is no shame in starting there. It is the correct starting point for most first-timers, and you will move off it faster than you expect.
The Progression Chain
BodyTree treats the plank as a short ladder inside the Ab Wheel branch. Each rung asks for a longer or harder hold before it unlocks the next:
- Bent-Knee Plank (Level 1) — plank from the knees, straight line from knees to head. Unlocks at 3 sets of 20 seconds.
- 25s Plank (Level 2) — the full plank on extended arms. This is the move most people picture. Unlocks at 3 sets of 25 seconds.
- 60s Plank (Level 3) — the same position held for a full minute, building anti-extension endurance. Unlocks at 3 sets of 60 seconds.
- One-Arm One-Leg Plank (Level 4) — raise the opposite arm and leg to add an anti-rotation challenge. Unlocks at 3 sets of 30 seconds.
Clear those and the branch hands you the ab wheel itself, starting from the knees. But there is no rush to get there. The plank rungs alone will give a beginner weeks of honest, useful work.
Sets, Reps, and Frequency
Because the plank is a hold, you train it in seconds, not reps. A simple, effective target is 3 sets of a hold at your current level, resting a minute or two between sets. When you can comfortably hit the unlock time on all three sets with clean form, move to the next rung.
Low actually recommends the plank as a warm-up positional drill, suggesting 30 to 60 seconds of it before your main work. That is a great way to practice it often without burning out. You can also give it a dedicated slot two or three times a week. Frequent, short, high-quality holds beat one long grind. Stop a set the moment your hips start to sag; a broken plank teaches the wrong lesson.
Coaching Cues
Low is specific about how a plank should feel. Borrowing his technique notes, keep these in mind:
- Start in a push-up position with a straight or very slightly rounded body, stomach kept tight and pulled in.
- Aim for a subtle dome between your hands and feet rather than an arch. Rounding slightly helps you find the position better than arching does.
- Squeeze your glutes and brace your core as if bracing for a light punch. This is what stops the hips from dropping.
- Do not let your hip flexors take over for your abs. If you feel the work move into the front of your hips, reset your bracing.
- Breathe. Hold the tension, not your breath.
Common Mistakes
Sagging hips. The most common fault. Your lower back arches and your belly drops. This trades your abs for your spine and defeats the purpose. Shorten the hold or drop to the knee version rather than hold a broken shape.
Piking up. The opposite error, where the hips ride high and the plank becomes a rest. Bring the hips down until you are a straight line.
Chasing time over form. A wobbly two-minute plank builds less than a rock-solid thirty seconds. The clock only counts while your form is clean.
Skipping the knee version. If a full plank makes your back ache, you are not failing, you are just one rung too high. Start on your knees.
Related Guides
Frequently Asked Questions
How long should a beginner hold a plank?
Start with whatever you can hold in perfect form, even if that is only 10 to 15 seconds. Aim to build toward 3 sets of 25 seconds on your hands, or start on your knees if the full plank makes your back ache. Quality of the hold matters far more than the number on the clock.
Is the plank enough to build a strong core?
The plank builds excellent anti-extension strength and body tension, which is the foundation for calisthenics core work. It is a fantastic starting point, but you will eventually add rotation and flexion work. In BodyTree it leads into the ab wheel progressions for more advanced core strength.
Why does my lower back hurt when I plank?
Almost always because your hips are sagging and your abs have handed the job to your spine. Squeeze your glutes, brace your stomach, and tuck the hips slightly. If it still bothers you, drop to the bent-knee plank until your bracing is stronger.
BodyTree tracks your progression through all 251 calisthenics skills — automatically generated programs, video proof, and a community of serious practitioners.
Get BodyTree — Free on iOS & Android