
Ring Rows: From Zero to Real Pulling Strength
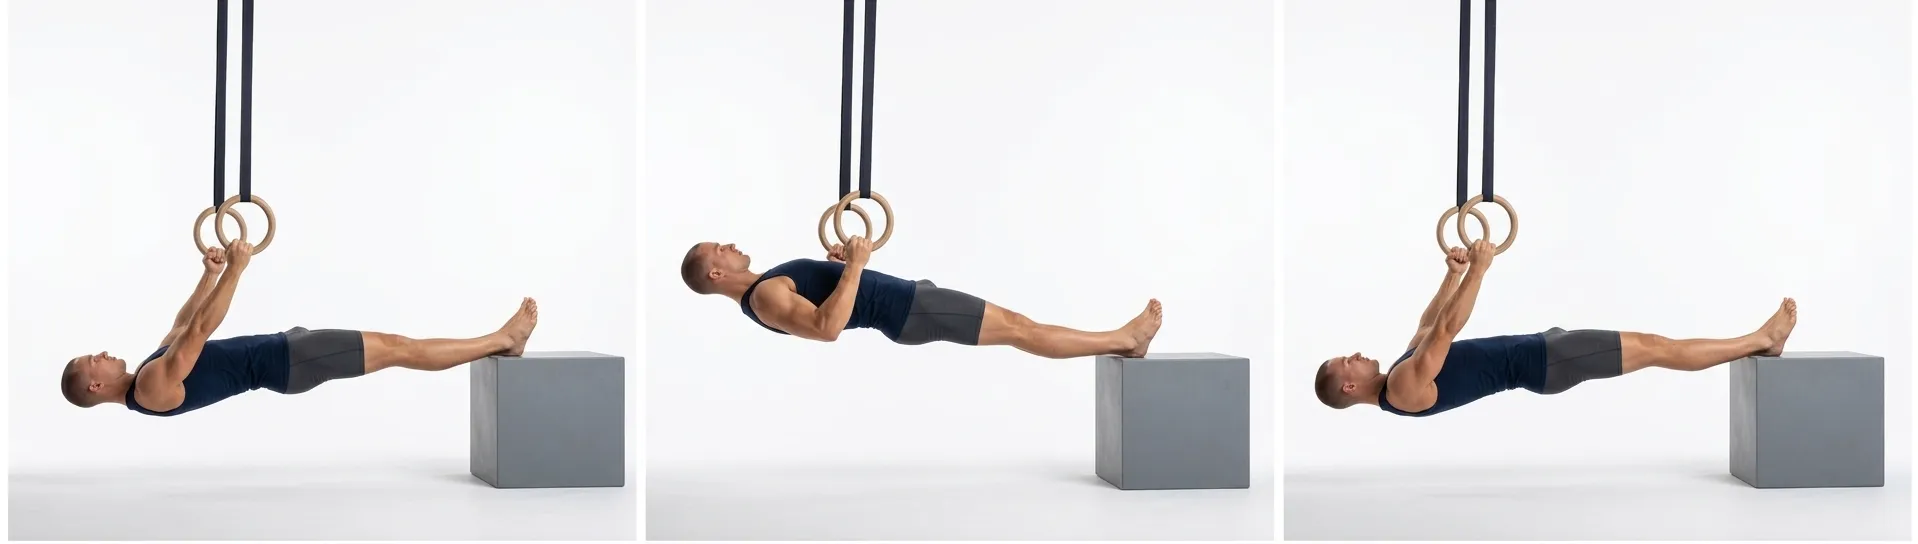
If you have never done a pull-up in your life and you are not sure your back even has muscles yet, ring rows are where you start. You stand on the ground the whole time, you decide exactly how hard each rep is by where you put your feet, and you can train them at home with a cheap pair of rings, a suspension trainer, or even a sturdy bar under a table. There is no minimum strength requirement and nothing to be embarrassed about. This is the horizontal pull that teaches your body how to pull at all, and almost everyone can do a version of it on day one.
Ring rows matter more than they look. According to Overcoming Gravity by Steven Low, horizontal pulling is one of the pillars of a balanced upper body, and skipping it is a common reason beginners end up with cranky, clicking shoulders. Learn to row well now and you build the exact muscles that make pull-ups, better posture, and healthy shoulders possible later.
What Is a Ring Row
A ring row is a horizontal pull. You hold a pair of gymnastic rings (or a suspension trainer) that hang from an anchor above you, lean back with your arms straight, and pull your chest up to the rings by driving your elbows behind you. Your feet stay on the floor and your body stays in one straight line from head to heels, like a moving plank.
Because you set the angle of your own body, the ring row scales infinitely. Stand almost upright and the row is easy. Walk your feet forward so your torso is closer to horizontal and it gets harder. This is what makes it perfect for a complete beginner: the same equipment that challenges a strong athlete can be dialed all the way down for someone on their first session.
The muscles it trains are the ones most beginners neglect. Overcoming Gravity notes that rowing motions heavily work the scapular retractors, rear deltoids, and external rotators, the small back-of-the-shoulder muscles that keep your shoulders balanced and pain-free. It also builds your lats, mid-back, and biceps, the same engine you will eventually use for pull-ups.
Prerequisites: What You Need Before You Start
Almost nothing, and that is the point. You do not need to be lean, strong, or coordinated first. If you can stand up and hold onto a handle, you can start today. Here is all you actually need:
- An anchor and a grip. Rings or a suspension trainer over a doorway or beam is ideal, but a low bar, a railing, or even a sturdy table edge will do for your very first attempts.
- The ability to make a straight-body shape. If you can hold a short plank without your hips sagging, you have enough core strength to keep good form in a row. If not, that is fine too, just start more upright.
- No pain in the shoulders or elbows. Rowing should feel like effort in the mid-back and arms, never a sharp pinch. If it pinches, stand more upright and reduce the load.
That is the whole list. The friendly truth is that the row itself builds the strength you were worried you needed to have first.
Progression Chain: Where Ring Rows Fit
In BodyTree's Rowing branch, the ring row is the second rung on a ladder that climbs all the way to a one-arm row. You do not need to think about the far end yet. You only need to know your first milestone and the one regression that sits just below you if today feels too hard.
The move directly before ring rows is the ring row eccentric: you help yourself to the top position, then lower yourself slowly over about five seconds. Once you can do three sets of five controlled negatives, you have earned the full ring row. From there the chain continues to wide ring rows, archer rows, and beyond, but those are months away and none of them are the ask today.
Sets, Reps, and Frequency
Ring rows are a concentric strength exercise, so BodyTree treats three sets of fifteen clean reps as the standard for mastery, in line with the Rule of Fifteen from Overcoming Gravity: aim for at least fifteen total quality repetitions across your working sets before you make the movement harder.
A simple way to start:
- Sets and reps: 3 sets of 5 to 8 reps at a body angle you can control with good form, building toward 3 sets of 15.
- Tempo: pull for one second, pause for a beat at the top with your shoulder blades squeezed, and lower for two to three controlled seconds. The slow lower is where much of the strength is built.
- Frequency: two to three sessions a week, with at least a day of rest between hard rowing days.
- Progression: when 3 sets of 15 feel manageable, do not add reps forever. Instead, walk your feet forward to lower your body angle, which resets the difficulty and pushes you toward the next rung.
Coaching Cues
Keep these few cues in mind and your rows will do exactly what they should:
- One straight line. Squeeze your glutes and brace your core so your body stays rigid from head to heels. No sagging hips, no piking up.
- Lead with the elbows. Think about driving your elbows down and back rather than yanking with your hands. This is what recruits the mid-back instead of only the arms.
- Squeeze the shoulder blades. At the top of each rep, pull your shoulder blades together as if pinching a pencil between them. Overcoming Gravity stresses this scapular retraction as the whole point of rowing for shoulder health.
- Full range. Arms completely straight at the bottom, chest all the way to the rings at the top. Half reps build half the strength.
- Chest proud. Keep your chest lifted and your neck long instead of shrugging up toward your ears.
Common Mistakes
The mistakes here are easy to fix once you know them:
- Sagging hips. The most common error is letting the middle drop so the row becomes a half plank collapse. Fix it by squeezing your glutes and thinking of the whole body as one board.
- Pulling with the arms only. If you feel it purely in your biceps and forearms, you are missing the back work. Slow down, lead with the elbows, and squeeze the shoulder blades at the top.
- Cutting the range short. Stopping before the chest reaches the rings, or never fully straightening the arms, robs you of most of the benefit. Earn the full range even if it means standing more upright.
- Jumping to horizontal too fast. Ego lowers the feet before the strength is there, form falls apart, and progress stalls. Stay at an angle where every rep looks clean, then lower it a little at a time.
- Shrugging. Letting the shoulders ride up toward the ears takes the mid-back out of the movement. Keep the shoulders set down and back throughout.
Related Guides
Frequently Asked Questions
Do I need gymnastic rings to do ring rows?
No. Rings or a suspension trainer are ideal because the angle scales so easily, but you can start with a low bar, a smith machine bar, a sturdy railing, or even a strong table edge. The key is a stable handle you can lean back from and pull your chest toward while your feet stay on the floor.
How do I make ring rows easier if I cannot do one yet?
Stand more upright. The closer your body is to vertical, the less of your weight you lift, so a nearly standing angle can be almost effortless. If even that is hard, use the ring row eccentric: help yourself to the top and lower slowly. Do three sets of five controlled negatives and you will soon own the full row.
How many ring rows should a beginner do?
Start with three sets of five to eight clean reps at an angle you can control, resting a couple of minutes between sets, two to three times a week. Build toward three sets of fifteen. Once that feels manageable, lower your body angle to make the movement harder rather than chasing endless reps.
Will ring rows help me get my first pull-up?
Yes. Ring rows build the lats, mid-back, rear shoulders, and grip that pull-ups demand, and they train the scapular retraction that keeps your shoulders healthy under load. They are one of the best low-stress ways to build pulling strength before your body is ready to hang and pull vertically.
BodyTree tracks your progression through all 251 calisthenics skills — automatically generated programs, video proof, and a community of serious practitioners.
Get BodyTree — Free on iOS & Android