
Tuck Back Lever: How to Learn It
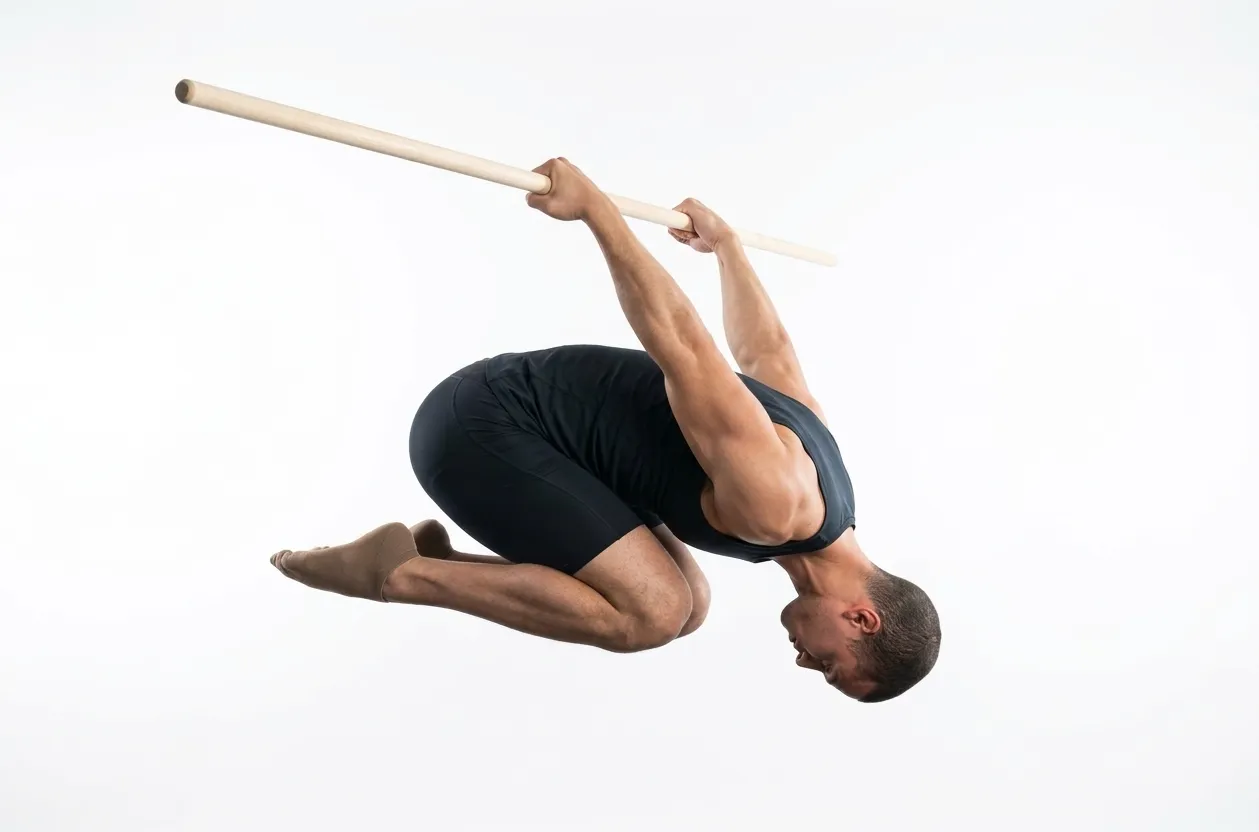
If you have watched someone hold their body horizontal beneath a bar, arms straight, and thought that is not for me, this guide is written for you. The back lever looks like an advanced-only skill, but the truth is kinder than that. Everyone starts the same way, from a plain hang, and the tuck back lever is simply the first honest rung on that ladder. You do not need a gym, years of training, or unusual strength. You need a bar or a set of rings, a little patience, and a willingness to build the position one small piece at a time. The tuck version keeps your knees pulled to your chest, which shortens the load and makes the whole thing learnable for a normal person starting from zero.
What Is the Tuck Back Lever
The back lever is a horizontal hold where your body hangs face-down and level with the floor, supported only by straight arms behind you. It is a pulling skill, even though nothing appears to move, because your shoulders and back are working hard to stop gravity folding you downward.
The tuck variation changes one thing: you keep your knees tucked tight to your chest. This pulls your weight in close to your shoulders and dramatically shortens the lever your muscles have to hold. A tucked body is far easier to keep horizontal than a long straight one, which is exactly why it is the entry point. Master the tuck first and every longer, harder version later becomes a matter of slowly opening your hips, not starting over.
Prerequisites: Where a Beginner Actually Starts
You do not begin with the tuck back lever. You begin with a hang. Before you tuck into the lever, you want to be comfortable in three things:
- A relaxed hang from a bar, arms straight, shoulders under control, for 20 to 30 seconds.
- A German hang, where you rotate backward and let your shoulders extend gently behind you. This builds the shoulder range and the connective-tissue tolerance the lever demands. Use a resistance band under your feet at first to take away load.
- Skin the cat, rotating all the way through from a hang to the German hang position and back with control. This teaches your shoulders to move safely through the full range you will hold statically in the lever.
If those feel steady, you are ready to try tucking into a horizontal hold. If they do not, that is not a setback, that is your training plan. Spend your weeks there first.
The Progression Chain
The back lever is a patient road, and the tuck is the fourth step on it. Here is the full chain so you can see where you are and where you are going. Each rung builds the strength and the tissue tolerance for the next, so there is no skipping.
Sets, Reps, and Frequency
The tuck back lever is an isometric hold, so you train it in time, not repetitions. A sensible target to consider the position owned is three sets of a 30 second hold with clean straight arms and a level torso.
Early on you will be nowhere near 30 seconds, and that is completely normal. Work in short, high-quality holds of 5 to 10 seconds, resting fully between them, and add a second or two as the weeks pass. Two to three sessions a week is plenty. Because this is a straight-arm skill that loads the elbows and shoulders, more is not better here. Give the connective tissue days to adapt between sessions, and stop a set the moment your form breaks rather than grinding out ugly seconds.
Coaching Cues
- Lock your arms straight. The elbows stay fully extended the entire hold. Bent arms turn the skill into something else and put the load in the wrong place.
- Tuck your knees tight to your chest. The tighter the tuck, the easier the hold. Do not let your legs drift open until you are ready for the next progression.
- Aim for a horizontal torso. Your back should reach level with the floor. If you cannot get there yet, hold higher and lower over time.
- Keep your shoulders active. Think of pushing the bar away slightly and staying tight through your upper back rather than sagging into your joints.
- Breathe. Short, steady breaths. Holding your breath makes a 10 second hold feel like forever.
Common Mistakes
- Rushing past the hangs. The single most common cause of sore elbows here is skipping the German hang and skin the cat weeks. Build the tissue first.
- Letting the tuck open. As you fatigue, the knees drift away from the chest and the hold suddenly feels impossible. Keep it tight or end the set.
- Bending the arms to cheat height. A bent-arm horizontal hold is not a back lever and trains a different pattern. Straight arms, even if it means holding higher.
- Chasing long holds too soon. Five clean seconds beat twenty sloppy ones. Quality builds the skill and protects your joints.
Prehab: Protecting Your Elbows and Shoulders
The back lever is a straight-arm skill, and straight-arm skills load the biceps tendon and the front of the shoulder in a stretched position. This is not a reason to avoid it, it is a reason to prepare. The research on connective tissue is clear that tendons and ligaments adapt more slowly than muscle, so they need a gentler, longer runway.
Two habits make all the difference. First, spend real time in straight-arm support and hang work before loading the lever, so your elbows learn to hold tension locked out. Trusted calisthenics references recommend building the biceps specifically to protect the elbow from hyperextension under these loads. Second, warm the shoulders and elbows thoroughly before every session with easy hangs and gentle rotations. Cold joints and stretched straight-arm positions do not mix.
Longevity: Training This for Years, Not Weeks
There is a well-established ordering to horizontal pulling skills, and it exists to keep you healthy. It is generally best to build the back lever before chasing the front lever, and both before harder straight-arm skills, precisely because each one prepares the connective tissue for the next. Respecting that order is how people train for years without elbow pain.
Progress in this family of skills is measured in months, not days. If a position feels sharp or tweaky in the joint rather than simply hard in the muscle, back off to the previous step and rebuild. The athletes who reach a full back lever are almost never the ones who rushed. They are the ones who treated every hang and every tuck hold as tissue-building work worth doing well.
Related Guides
Frequently Asked Questions
Do I need rings, or will a pull-up bar work?
A sturdy pull-up bar works well for learning the tuck back lever. Rings let your hands rotate freely, which some people find kinder on the wrists and shoulders, but they are not required. Use whatever you have and can access consistently.
How long until I can hold a tuck back lever?
It varies with your starting point, but if you build the hangs first, many beginners reach a solid tuck hold within a couple of months of consistent, patient practice. The connective tissue work early on is what makes that timeline safe.
My elbows feel sore after training this. What should I do?
Back off the lever and spend more time on German hangs, straight-arm support holds, and gentle biceps strengthening to protect the elbow. Soreness in the joint rather than the muscle is a signal to rebuild the base, not to push through.
Is the tuck back lever safe for a complete beginner?
Yes, provided you earn it. Start with relaxed hangs, then banded German hangs, then skin the cat, and only then tuck into the lever. Built in that order, it is a very reasonable goal for someone new to calisthenics.
BodyTree tracks your progression through all 251 calisthenics skills — automatically generated programs, video proof, and a community of serious practitioners.
Get BodyTree — Free on iOS & Android